This is the multi-page printable view of this section. Click here to print.
Tools
- Thinking Tools
- Tools
- Adding Split-Routing Support to AdGuardHome
- A New Choice for Ad Blocking—AdGuardPrivate
- Using curl to Fetch DNS Results
- How to Use Bing International Edition
- WeRead Experience Sharing
- Turning off the discrete GPU to save power
- Docker
- adguard
- Let's Encrypt Certificate Issuance Limits
- Testing Tools
- AI
Thinking Tools
1. Basic Logical Thinking Methods
-
Induction & Deduction
- Induction: Generalize universal laws from particular cases (e.g., deriving the concept of “horse” from “black horses, white horses”).
- Deduction: Derive specific conclusions from universal laws (e.g., using the definition of “horse” to infer “black horse” or “white horse”).
- Use cases: Scientific research, data analysis, rule-making.
-
Analysis & Synthesis
- Analysis: Break down the whole into parts to study it (e.g., dissecting light’s wave-particle duality).
- Synthesis: Integrate parts into a unified whole (e.g., combining wave and particle theories of light to propose a new theory).
- Use cases: Deconstructing complex problems, system design.
-
Causal Reasoning
- Forward reasoning: Infer effects from causes (e.g., “rain → wet ground”).
- Backward reasoning: Infer causes from effects (e.g., “wet ground → probable rain”).
- Use cases: Troubleshooting, logical deduction.
2. Structured Thinking Tools
-
Golden Circle (Why-How-What)
- Why: Core purpose (why do it).
- How: Path to realization (how to do it).
- What: Concrete actions (what to do).
- Use cases: Strategic planning, presentation skills (e.g., Apple’s “We believe in challenging the status quo through innovation”).
-
SCQA Model
- S (Situation): Contextual background.
- C (Complication): Conflict or problem.
- Q (Question): Core question raised.
- A (Answer): Solution.
- Use cases: Structured delivery in speeches, reports, proposals.
-
Pyramid Principle
- Structure: Central thesis → sub-arguments → supporting details.
- Use cases: Writing, reporting, logical communication (e.g., “Digital transformation is inevitable” → supported by market, customer, and competition angles).
-
5W1H Analysis
- What: What to do?
- Why: Why do it?
- Who: Who will do it?
- Where: Where will it be done?
- When: When will it occur?
- How: How will it be done?
- Use cases: Project planning, task decomposition (e.g., detailed plan for self-media operations).
3. Decision & Problem-Solving Tools
-
SWOT Analysis
- Strengths: Internal strengths.
- Weaknesses: Internal weaknesses.
- Opportunities: External opportunities.
- Threats: External risks.
- Use cases: Business strategy, personal career planning.
-
10/10/10 Rule
- Question: Evaluate the impact of a decision across three time horizons (10 minutes, 10 months, 10 years).
- Use cases: Balancing short- and long-term decisions (e.g., changing jobs, investing).
-
Fishbone (Ishikawa) Diagram
- Structure: Visualize the problem (fish head) and possible causes (fishbone branches).
- Use cases: Root-cause analysis (e.g., product quality issues, inefficiency reasons).
-
PDCA Cycle (Deming Wheel)
- Plan: Plan.
- Do: Execute.
- Check: Check results.
- Act: Improve and standardize.
- Use cases: Process optimization, continuous improvement (e.g., iterating self-media content).
4. Learning & Communication Tools
-
Feynman Technique
- Steps:
- Choose a concept;
- Teach it in simple terms;
- Identify gaps & simplify;
- Retell in plain language.
- Use cases: Knowledge internalization, lesson preparation.
- Steps:
-
Mind Mapping
- Traits: Radiate branches from a central topic to visualize relationships.
- Use cases: Note-taking, idea generation (e.g., planning an event).
-
SCAMPER Prompts (Creative Thinking)
- S (Substitute): Substitute.
- C (Combine): Combine.
- A (Adapt): Adapt.
- M (Modify/Magnify): Modify/Magnify.
- P (Put to another use): Repurpose.
- E (Eliminate): Eliminate.
- R (Rearrange/Reverse): Rearrange/Reverse.
- Use cases: Product innovation, solution refinement.
-
Six Thinking Hats
- Role assignment:
- White hat (data), Red hat (feelings), Black hat (risks), Yellow hat (value), Green hat (creativity), Blue hat (control).
- Use cases: Team brainstorming, multi-perspective decision-making.
- Role assignment:
5. Systems & Innovative Thinking
-
Johari Window
- Four-area model:
- Open area (known to self and others).
- Hidden area (known to self, unknown to others).
- Blind area (unknown to self, known to others).
- Unknown area (unknown to all).
- Use cases: Team communication, self-awareness growth.
- Four-area model:
-
Upstream Thinking (Root-Cause Focus)
- Core: Tackle root issues instead of surface symptoms.
- Use cases: Long-term problem solving (e.g., Dewey eliminating malaria by eradicating mosquito breeding sites).
-
80/20 Rule (Pareto Principle)
- Premise: 20 % of causes produce 80 % of results.
- Use cases: Resource allocation (e.g., focusing on 20 % of key customers).
6. High-Efficiency Action Tools
-
Retrospection Method
- Steps: Review actions → analyze gains & losses → extract lessons learned.
-
Minimum Viable Product (MVP)
- Core: Launch a basic version quickly to validate demand, then iterate.
- Use cases: Product development, startup validation.
- 5-Whys Analysis
- Method: Ask “why” five times or more until the root cause is uncovered.
- Use cases: Troubleshooting, habit-building (e.g., analyzing reasons for overtime).
7. Other Practical Tools
- Nine-Box Grid: Radiate from a central problem to nine directions to avoid over-divergence.
- Mind Map + Mandala Matrix: Blend visualization and structured thought.
- Golden Time Circle: Separate tasks into “important–urgent” quadrants to prioritize time.
Summary
These tools can be flexibly combined according to context:
- Learning: Feynman Method, Mind Mapping, Deliberate Practice.
- Decision-Making: Golden Circle, SWOT, 10/10/10 Rule.
- Communication: SCQA, Six Thinking Hats, Johari Window.
- Innovation: SCAMPER, Upstream Thinking, 5W1H.
By integrating multiple tools, you can sharpen thinking efficiency, break cognitive limits, and solve problems more effectively to reach goals.
Tools
Adding Split-Routing Support to AdGuardHome
Open-source repo: https://github.com/AdGuardPrivate/AdGuardPrivate
Out of the box, AdGuardHome has no built-in split-routing rules—you either hand-write them or configure an upstream file, which is one of its pain points.
It took quite a while to develop and thoroughly test the split-routing feature, but it’s now running stably.
With split-routing in place, you no longer need to put SmartDNS in front of AdGuardHome; the single AdGuardPrivate binary handles everything.
At the moment the feature only supports splitting traffic into two upstream pools: A and B—part of your traffic goes to pool A, the rest to pool B. Enabling more flexible routing would require significantly more work, as the routing logic spans both AdGuardHome and dnsproxy. If two pools aren’t enough, feel free to fork the project and experiment yourself.
Issues or suggestions are welcome; the current version focuses on quality-of-life improvements for users in specific regions.

A New Choice for Ad Blocking—AdGuardPrivate
AdGuardPrivate is a DNS–based service focused on protecting network privacy and blocking ads. Built atop the open-source project AdGuard Home, it uses intelligent traffic analysis and filtration to deliver a secure, high-performance browsing experience. Below are its key features and characteristics:
Core Functionality: Ad Blocking & Privacy Protection
- Ad Blocking: Intercepts web advertisements (banners, pop-ups, video ads, etc.) and in-app ads at the DNS level, speeding up page loads and improving device performance.
- Privacy Protection: Prevents tracking scripts, social-media widgets, and privacy-breaching requests from collecting behavioral data; blocks malicious sites, phishing links, and malware.
- DNS Anti-Hijacking: Ensures accurate and secure domain resolution through encrypted DNS (DoT, DoH, HTTP/3), guarding against traffic tampering.
Advanced Features: Customization & Optimization
- Custom Rules: Allow users to import third-party allow/deny lists or create personalized filtering rules, granting fine control over access to specific apps, sites, or games.
- Smart Resolution: Supports friendly domain resolution for LAN devices (e.g., NAS or corporate servers), simplifying network management.
- Statistics & Analytics: Provides detailed request logs, blocking statistics, and 72-hour query history, giving users visibility into their network usage.
Family & Enterprise Scenarios
- Parental Controls: Blocks adult sites and games; helps manage household internet time and protect minors.
- Enterprise Deployment: Offers distributed server load balancing and optimized China-mainland access speed, backed by stable Alibaba Cloud nodes.
Platform Compatibility & Service Tiers
- Cross-Platform: Works on multiple operating systems with no extra software required—just configure encrypted DNS and go.
- Service Models:
- Free Public Service: Core ad-blocking and security rules; may trigger occasional false positives.
- Paid Private Service: Adds custom resolution, authoritative DNS, per-device ID tracking for usage history, and more—ideal for users needing advanced personalization.
Technical Strengths & Limitations
-
Strengths: Works across all devices, adds zero overhead, reduces unnecessary data loads—great for mobile battery life.
-
Limitations: Less granular than browser extensions; cannot perform deep HTTPS content filtering (e.g., MITM-based filters).
-
Example Use Cases
- Individual Users: Block in-app ads on mobile devices to enhance the user experience.
- Family Users: Deploy on a home router to block ads on every household device and restrict kids from inappropriate content.
- Enterprise Networks: Combine with custom rules to bar entertainment sites, boost employee productivity, and safeguard internal data.
Using curl to Fetch DNS Results
This article presents two methods to retrieve DNS query results using curl:
- DNS JSON format
- DNS Wire Format
1. DNS JSON Format Queries
Returns DNS responses in JSON, making them easy to parse.
curl -H 'accept: application/dns-json' "https://dns.google/resolve?name=baidu.com&type=A" | jq .
Cloudflare
curl -H 'accept: application/dns-json' 'https://cloudflare-dns.com/dns-query?name=baidu.com&type=A' | jq .
Aliyun
curl -H "accept: application/dns-json" "https://223.5.5.5/resolve?name=baidu.com&type=1" | jq .
dns.pub
curl -H 'accept: application/dns-json' 'https://doh.dns.pub/dns-query?name=baidu.com&type=A' | jq .
AdGuard Private DNS
# Currently unsupported
2. DNS Wire Format Queries
Returns binary DNS responses that require further parsing.
curl -H 'accept: application/dns-message' 'https://dns.google/dns-query?dns=q80BAAABAAAAAAAAA3d3dwdleGFtcGxlA2NvbQAAAQAB' | hexdump -c
Cloudflare
curl -H 'accept: application/dns-message' 'https://cloudflare-dns.com/dns-query?dns=q80BAAABAAAAAAAAA3d3dwdleGFtcGxlA2NvbQAAAQAB' | hexdump -c
Aliyun
curl -H 'accept: application/dns-message' "https://dns.alidns.com/dns-query?dns=P8QBAAABAAAAAAAABWJhaWR1A2NvbQAAAQAB" | hexdump -c
dns.pub
curl -H 'accept: application/dns-message' 'https://doh.dns.pub/dns-query?dns=q80BAAABAAAAAAAAA3d3dwdleGFtcGxlA2NvbQAAAQAB' | hexdump -c
AdGuard Private DNS
curl -H 'accept: application/dns-message' 'https://public0.adguardprivate.com/dns-query?dns=q80BAAABAAAAAAAAA3d3dwdleGFtcGxlA2NvbQAAAQAB' | hexdump -c
Parsing DNS Responses with Python
# pip install dnspython
# pip install requests
# Parsing JSON responses
import json
import requests

def query_dns_json(domain="example.com", type="A"):
  """Query DNS using JSON format"""
  url = "https://dns.google/resolve"
  params = {"name": domain, "type": type}
  headers = {"accept": "application/dns-json"}

  response = requests.get(url, params=params, headers=headers)
  return json.dumps(response.json(), indent=2)

# Parsing Wire Format responses
def query_dns_wire(domain="example.com"):
  """Query DNS using Wire Format"""
  import dns.message
  import requests
  import base64

  # Create DNS query message
  query = dns.message.make_query(domain, 'A')
  wire_format = query.to_wire()
  dns_query = base64.b64encode(wire_format).decode('utf-8')

  # Send request
  url = "https://dns.google/dns-query"
  params = {"dns": dns_query}
  headers = {"accept": "application/dns-message"}

  response = requests.get(url, params=params, headers=headers)
  dns_response = dns.message.from_wire(response.content)
  return str(dns_response)

if __name__ == "__main__":
  print("JSON query result:")
  print(query_dns_json())
  print("\nWire Format query result:")
  print(query_dns_wire())
Generating Base64-Encoded DNS Wire Format Data
# pip install dnspython
import base64
import dns.message
import dns.rdatatype

# Create a DNS query message
query = dns.message.make_query('example.com', dns.rdatatype.A)

# Convert message to Wire Format
wire_format = query.to_wire()

# Encode to base64
wire_format_base64 = base64.b64encode(wire_format).decode('utf-8')

# Print
print(wire_format_base64)
How to Use Bing International Edition
Some search engines refuse to innovate; valuable content keeps decreasing while ads keep multiplying. Many have started abandoning them and switched to Bing (bing.com).
Bing comes in multiple versions:
- cn.bing.com is the China edition; search results are censored.
- Domestic edition: mainly searches Chinese content.

- International edition: searches both Chinese and English content.

- Domestic edition: mainly searches Chinese content.
- www.bing.com is the genuine international edition; there is no mainland-China censorship, letting you find much more “you-know-what” content.

Search results differ among the three editions. For users who can read English, I strongly recommend the international edition—it yields far more valuable material.
I won’t elaborate on how search results differ in the true international edition; try it yourself if you’re curious.
The true international edition even offers an entry point for Microsoft Copilot, similar to ChatGPT. It can summarize search results for you. Although there is a usage frequency limit, normal everyday use is perfectly fine.
Switching between the domestic and international editions isn’t difficult; the focus here is how to access the real Bing International edition.
Many people have scratched their heads for ages in the settings without success—probably because they were looking in the wrong place.
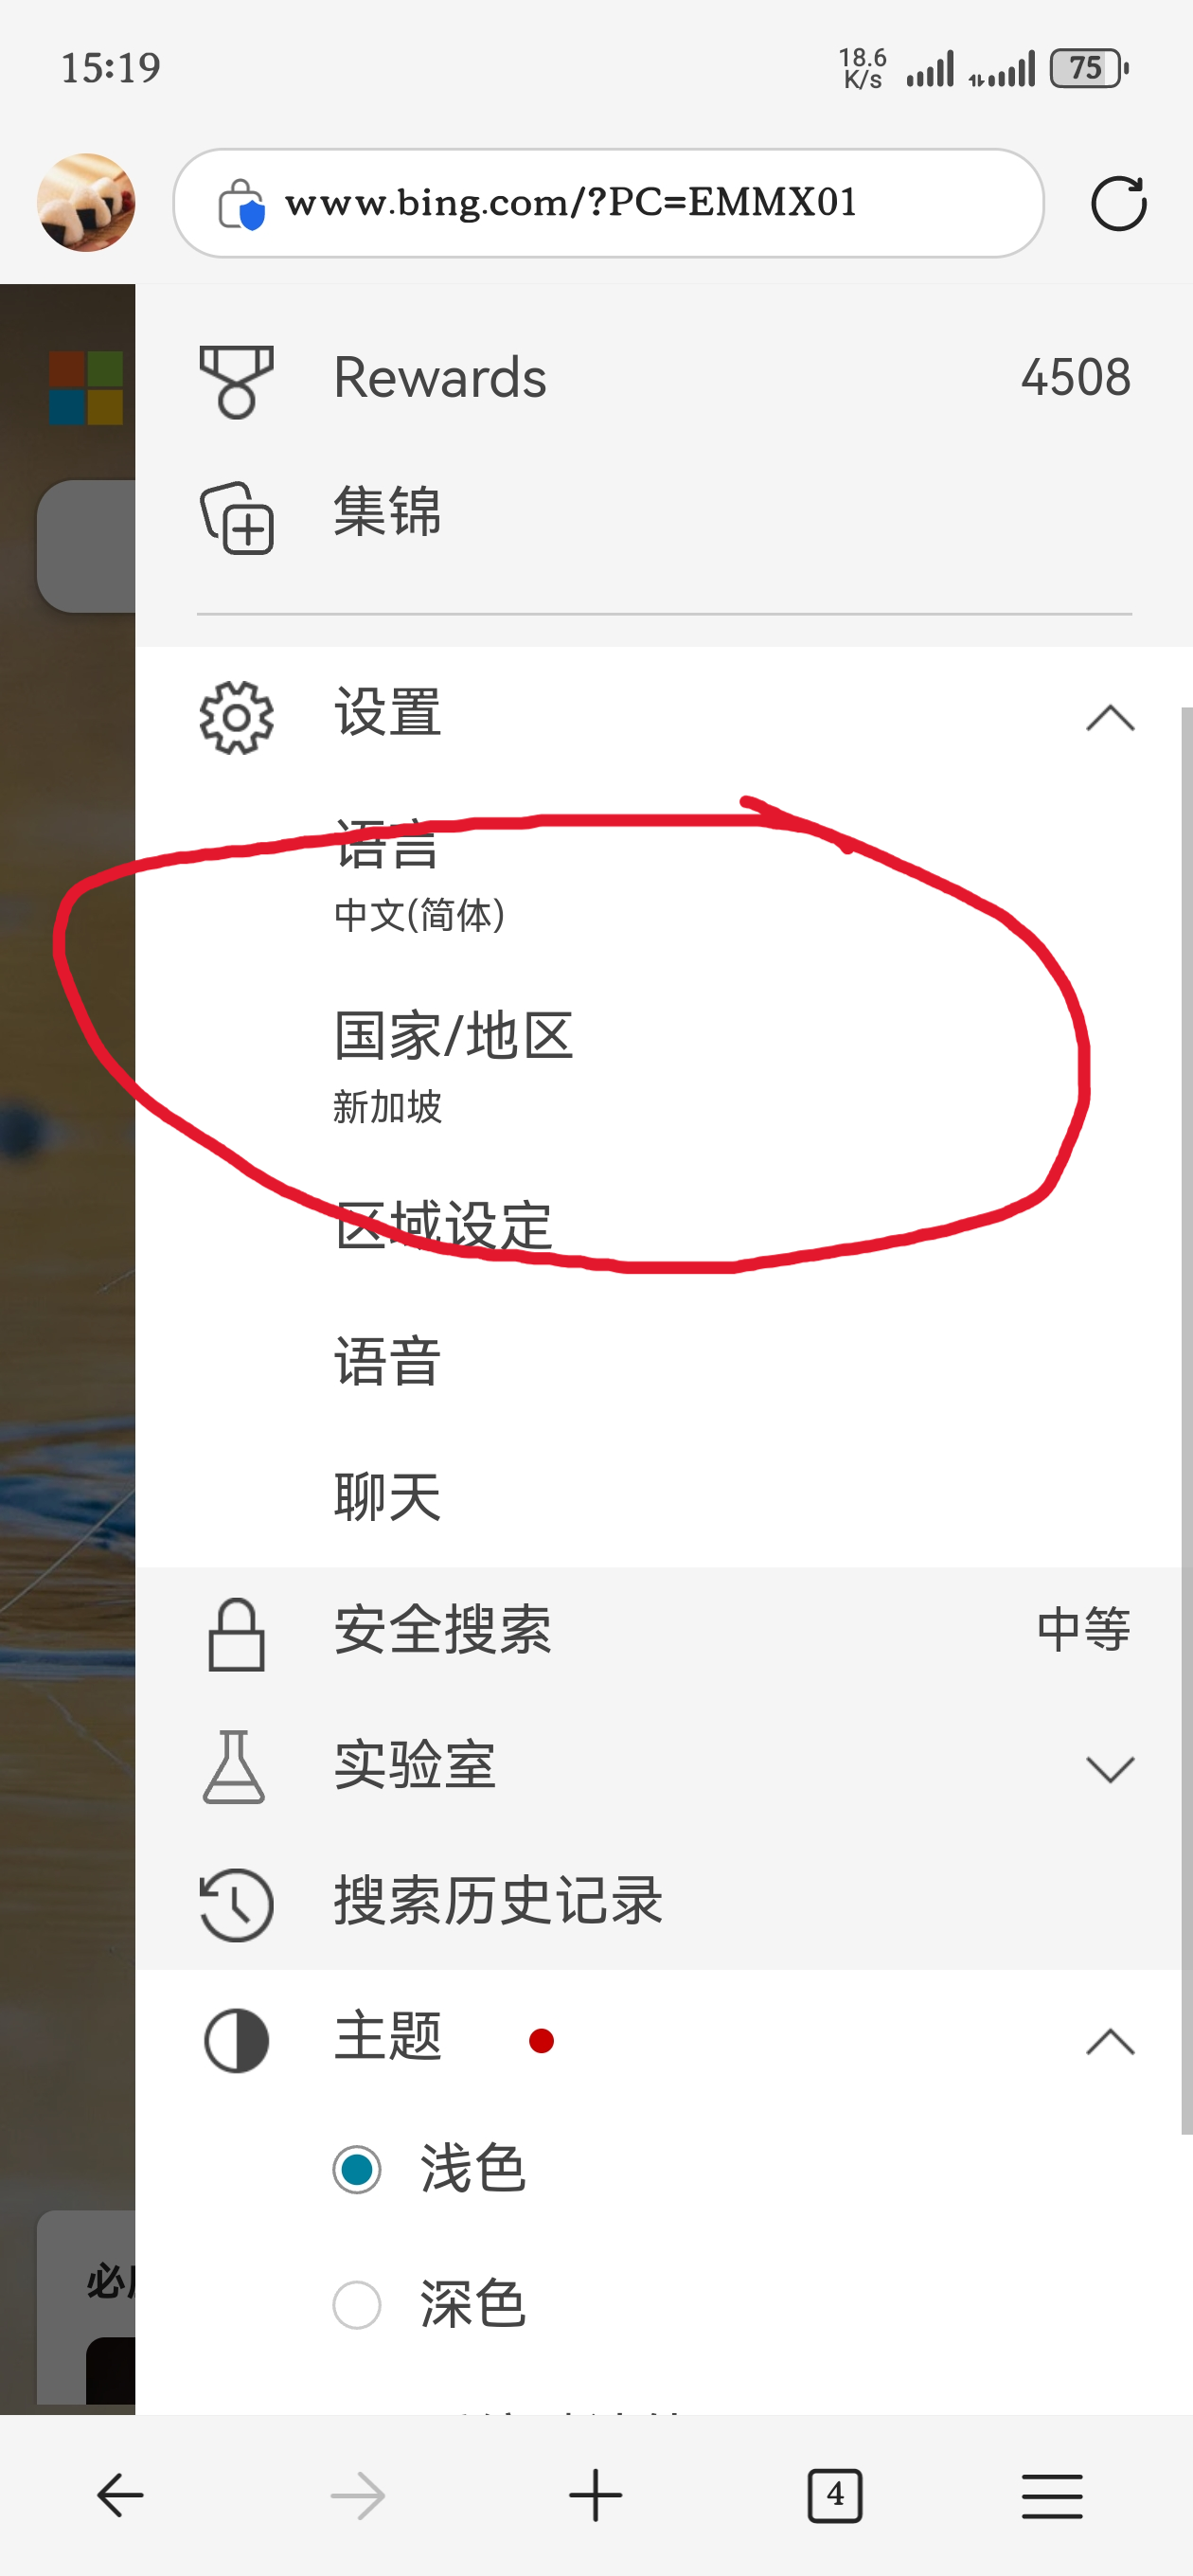
The real restriction lies in DNS. DNS can return different resolution results based on the requester’s geographic location. For instance, requests for qq.com from Shandong and Henan may yield different IP addresses. Typically, DNS provides the server IP that is geographically closest.
Therefore, if you want to use the international edition, try switching your DNS to Google’s tls://dns.google or Cloudflare’s tls://one.one.one.one.
Only the encrypted DNS addresses from these two DNS providers are listed here; raw-IP DNS endpoints are intentionally omitted, because overseas plain-IP DNS is easily hijacked. Giving out 8.8.8.8 or 1.1.1.1 is pointless.
Refer to How to Configure Encrypted DNS for setup instructions.
Note: using encrypted DNS is the simplest way to gain access to Bing International; other methods exist but won’t be covered here.
If one DNS endpoint does not work, try the following in order:
tls://dns.googletls://one.one.one.onetls://8.8.8.8tls://8.8.4.4tls://1.1.1.1tls://1.0.0.1
Usually two of them will connect successfully. If none work, you’ll need to explore other solutions.
WeRead Experience Sharing
There are many free reading options, but WeRead truly offers one of the better experiences. Those seeking free books can look at zlibrary.
This post mainly covers the day-to-day use of WeRead and a few helpful tools. If any content infringes rights, please contact me for removal: [email protected]
WeChat Read Auto Check-in & Read-Time Boost
Just to get a cheaper WeChat Read membership.
This document may be out of date; for the latest version visit the open-source repository: https://github.com/jqknono/weread-challenge-selenium

WeChat Read Rules
- Offline reading counts toward the total, but must sync while online.
- Web edition, e-ink, mini-program, TTS, and audiobook listening all count.
- Sessions judged as “too long” in a single auto-read/listen will have the excess excluded based on behavioral features.
- A day counts only after >5 minutes of reading that day.
- Pay ¥5 to get 2 days of membership immediately; read for 29 of the next 30 days and rack up 30 hours to earn 30 more days + 30 coins.
- Pay ¥50 to get 30 days immediately; read 360 of the next 365 days and reach 300 hours to earn 365 days + 500 coins.
Undocumented quirks observed in practice:
- On the 29th day, after check-in, you instantly get the membership reward and can immediately start the next round of challenges—no need to wait until day 31. The 29th check-in is counted for both the previous and the next round.
- After the first round (29 days), every 28 days grants 32 days of membership.
1 + 28 × 13 = 365 ⇒ 13 rounds a year, costing ¥65, yielding 32 × 13 = 416 days of membership + 390 coins. - The annual challenge is cheaper but runs longer and carries more risk.
Tool Features
- Headful browser.
- Local or remote browser support.
- Random browser width & height.
- Wait-for-login support.
- QR login refresh support.
- Save / load cookies.
- Choose the X-th last-read book or pick at random.
- Auto page turning.
- Jump to next chapter.
- Loop back to chapter 1 after finishing.
- Configurable reading speed.
- Random per-page and turn-page delays.
- Screenshot every minute.
- Logging.
- Scheduled tasks.
- Configurable reading duration.
- Email notifications.
- Multi-platform:
linux | windows | macos.
- Browser support:
chrome | MicrosoftEdge | firefox. - Multi-user support.
- Force refresh on error.
- Usage stats.
Linux
Run Directly
# install nodejs
sudo apt install nodejs
# old nodejs versions need npm
sudo apt install npm
# create work dir
mkdir -p $HOME/Documents/weread-challenge
cd $HOME/Documents/weread-challenge
# install deps
npm install selenium-webdriver
# download script
wget https://storage1.techfetch.dev/weread-challenge/weread-challenge.js -O weread-challenge.js
# set runtime param via env
export WEREAD_BROWSER="chrome"
# run
WEREAD_BROWSER="chrome" node weread-challenge.js
For e-mail notifications install nodemailer:
npm install nodemailer
Docker Compose Run
services:
  app:
    image: jqknono/weread-challenge:latest
    pull_policy: always
    environment:
      - WEREAD_REMOTE_BROWSER=http://selenium:4444
      - WEREAD_DURATION=68
    volumes:
      - ./data:/app/data
    depends_on:
      selenium:
        condition: service_healthy

  selenium:
    image: selenium/standalone-chrome:4.26
    pull_policy: if_not_present
    shm_size: 2gb
    volumes:
      - /var/run/docker.sock:/var/run/docker.sock
    environment:
      - SE_ENABLE_TRACING=false
      - SE_BIND_HOST=false
      - SE_JAVA_DISABLE_HOSTNAME_VERIFICATION=false
    healthcheck:
      test: ["CMD", "curl", "-f", "http://localhost:4444/wd/hub/status"]
      interval: 5s
      timeout: 60s
      retries: 10
Save as docker-compose.yml, then run docker compose up -d.
On first launch you must scan the WeChat QR code; the code is saved in ./data/login.png.
Docker Run
# run selenium standalone
docker run --restart always -d --name selenium-live \
  -v /var/run/docker.sock:/var/run/docker.sock \
  --shm-size="2g" \
  -p 4444:4444 \
  -p 7900:7900 \
  -e SE_ENABLE_TRACING=false \
  -e SE_BIND_HOST=false \
  -e SE_JAVA_DISABLE_HOSTNAME_VERIFICATION=false \
  -e SE_NODE_MAX_INSTANCES=10 \
  -e SE_NODE_MAX_SESSIONS=10 \
  -e SE_NODE_OVERRIDE_MAX_SESSIONS=true \
  selenium/standalone-chrome:4.26

# run weread-challenge
docker run --rm --name user-read \
  -v $HOME/weread-challenge/user/data:/app/data \
  -e WEREAD_REMOTE_BROWSER=http://172.17.0.2:4444 \
  -e WEREAD_DURATION=68 \
  weread-challenge:latest

# add another user
docker run --rm --name user2-read \
  -v $HOME/weread-challenge/user2/data:/app/data \
  -e WEREAD_REMOTE_BROWSER=http://172.17.0.2:4444 \
  -e WEREAD_DURATION=68 \
  weread-challenge:latest
On first launch you must scan the WeChat QR code; the code is saved in ./data/login.png.
Create Cron Jobs
Via docker-compose
WORKDIR=$HOME/weread-challenge
mkdir -p $WORKDIR
cd $WORKDIR
cat > $WORKDIR/docker-compose.yml <<EOF
services:
  app:
    image: jqknono/weread-challenge:latest
    pull_policy: always
    environment:
      - WEREAD_REMOTE_BROWSER=http://selenium:4444
      - WEREAD_DURATION=68
    volumes:
      - ./data:/app/data
    depends_on:
      selenium:
        condition: service_healthy

  selenium:
    image: selenium/standalone-chrome:4.26
    pull_policy: if_not_present
    shm_size: 2gb
    volumes:
      - /var/run/docker.sock:/var/run/docker.sock
    environment:
      - SE_ENABLE_TRACING=false
      - SE_BIND_HOST=false
      - SE_JAVA_DISABLE_HOSTNAME_VERIFICATION=false
    healthcheck:
      test: ["CMD", "curl", "-f", "http://localhost:4444/wd/hub/status"]
      interval: 5s
      timeout: 60s
      retries: 10
EOF
# after first launch scan the QR code saved in $HOME/weread-challenge/data/login.png
# start at 07:00 daily, read for 68 min
(crontab -l 2>/dev/null; echo "00 07 * * *  cd $WORKDIR && docker compose up -d") | crontab -
Via Docker only
# launch browser
docker run --restart always -d --name selenium-live \
  -v /var/run/docker.sock:/var/run/docker.sock \
  --shm-size="2g" \
  -p 4444:4444 \
  -p 7900:7900 \
  -e SE_ENABLE_TRACING=false \
  -e SE_BIND_HOST=false \
  -e SE_JAVA_DISABLE_HOSTNAME_VERIFICATION=false \
  -e SE_NODE_MAX_INSTANCES=3 \
  -e SE_NODE_MAX_SESSIONS=3 \
  -e SE_NODE_OVERRIDE_MAX_SESSIONS=true \
  -e SE_SESSION_REQUEST_TIMEOUT=10 \
  -e SE_SESSION_RETRY_INTERVAL=3 \
  selenium/standalone-chrome:4.26

WEREAD_USER="user"
mkdir -p $HOME/weread-challenge/$WEREAD_USER/data

# Get container IP
Selenium_IP=$(docker inspect -f '{{range.NetworkSettings.Networks}}{{.IPAddress}}{{end}}' selenium-live)

# after first launch scan the QR code saved in $HOME/weread-challenge/$WEREAD_USER/data/login.png
# start at 07:00 daily, read for 68 min
(crontab -l 2>/dev/null; echo "00 07 * * * docker run --rm --name ${WEREAD_USER}-read -v $HOME/weread-challenge/${WEREAD_USER}/data:/app/data -e WEREAD_REMOTE_BROWSER=http://${Selenium_IP}:4444 -e WEREAD_DURATION=68 -e WEREAD_USER=${WEREAD_USER} jqknono/weread-challenge:latest") | crontab -
Windows
# install nodejs
winget install -e --id Node.js.Node.js
# create work dir
mkdir -p $HOME/Documents/weread-challenge
cd $HOME/Documents/weread-challenge
# install deps
npm install selenium-webdriver
# download script via powershell
Invoke-WebRequest -Uri https://storage1.techfetch.dev/weread-challenge/weread-challenge.js -OutFile weread-challenge.js
# set runtime param
$env:WEREAD_BROWSER="MicrosoftEdge"
# run
node weread-challenge.js
Docker usage is the same as on Linux.
MacOS
# install nodejs
brew install node
# create work dir
mkdir -p $HOME/Documents/weread-challenge
cd $HOME/Documents/weread-challenge
# install deps
npm install selenium-webdriver
# download script
wget https://storage1.techfetch.dev/weread-challenge/weread-challenge.js -O weread-challenge.js
# set runtime param
export WEREAD_BROWSER="chrome"
# run
node weread-challenge.js
Docker usage the same as on Linux.
Multi-User Support
# launch browser
docker run --restart always -d --name selenium-live \
  -v /var/run/docker.sock:/var/run/docker.sock \
  --shm-size="2g" \
  -p 4444:4444 \
  -p 7900:7900 \
  -e SE_ENABLE_TRACING=false \
  -e SE_BIND_HOST=false \
  -e SE_JAVA_DISABLE_HOSTNAME_VERIFICATION=false \
  -e SE_NODE_MAX_INSTANCES=10 \
  -e SE_NODE_MAX_SESSIONS=10 \
  -e SE_NODE_OVERRIDE_MAX_SESSIONS=true \
  selenium/standalone-chrome:4.26

WEREAD_USER1="user1"
WEREAD_USER2="user2"
mkdir -p $HOME/weread-challenge/$WEREAD_USER1/data
mkdir -p $HOME/weread-challenge/$WEREAD_USER2/data

# Get container IP
Selenium_IP=$(docker inspect -f '{{range.NetworkSettings.Networks}}{{.IPAddress}}{{end}}' selenium-live)

# after first launch, scan the QR codes stored in:
# /$HOME/weread-challenge/${WEREAD_USER1}/data/login.png
# /$HOME/weread-challenge/${WEREAD_USER2}/data/login.png
# start at 07:00 daily, read for 68 min
(crontab -l 2>/dev/null; echo "00 07 * * * docker run --rm --name ${WEREAD_USER1}-read -v $HOME/weread-challenge/${WEREAD_USER1}/data:/app/data -e WEREAD_REMOTE_BROWSER=http://${Selenium_IP}:4444 -e WEREAD_DURATION=68 -e WEREAD_USER=${WEREAD_USER1} jqknono/weread-challenge:latest") | crontab -
(crontab -l 2>/dev/null; echo "00 07 * * * docker run --rm --name ${WEREAD_USER2}-read -v $HOME/weread-challenge/${WEREAD_USER2}/data:/app/data -e WEREAD_REMOTE_BROWSER=http://${Selenium_IP}:4444 -e WEREAD_DURATION=68 -e WEREAD_USER=${WEREAD_USER2} jqknono/weread-challenge:latest") | crontab -
Configurable Options
| Environment Variable | Default | Options | Description |
|---|---|---|---|
WEREAD_USER |
weread-default |
- | User label |
WEREAD_REMOTE_BROWSER |
"" | - | Remote browser URL |
WEREAD_DURATION |
10 |
- | Reading duration (min) |
WEREAD_SPEED |
slow |
slow,normal,fast |
Reading speed |
WEREAD_SELECTION |
random |
[0-4] | Select book to read |
WEREAD_BROWSER |
chrome |
chrome,MicrosoftEdge,firefox |
Browser to use |
ENABLE_EMAIL |
false |
true,false |
Enable email notification |
EMAIL_SMTP |
"" | - | SMTP server |
EMAIL_USER |
"" | - | Username |
EMAIL_PASS |
"" | - | Password/App key |
EMAIL_TO |
"" | - | Recipient address |
WEREAD_AGREE_TERMS |
true |
true,false |
Privacy consent |
Notes
- 28-day cycle → 30 hrs → at least 65 min daily (not 60).
- WeChat Read’s count may drop a few minutes, so aim for 68 min instead of 65.
- Login cookies via QR expire in 30 days—perfect for monthly challenges.
- Emails may land in spam; whitelist the sender.
- Educational use only—no commercial or illegal use.
- If infringement is suspected, contact
[email protected]for immediate takedown.
Privacy Policy
- Data Collected
- Cookies used only for user stat display.
- Usage stats:
user name | first launch | last launch | total runs | browser | OS | reading duration | abnormal exit reason. - Set
WEREAD_AGREE_TERMS=falseto opt out entirely.
- Risk Warning
- Cookies can log into WeChat Read but this tool never uses them to log in again.
- Tencent shows risk prompts on abnormal logins; check in mobile client under Settings → Logged-in Devices.
- Pure JS, easily de-obfuscated—always verify logged-in devices when using automation.
References
- Script download: weread-challenge.js
- GitHub: https://github.com/jqknono/weread-challenge-selenium
- Stats dashboard: https://weread-challenge.techfetch.dev
- Original post: https://blog.techfetch.dev
Turning off the discrete GPU to save power
This post is for friends who rarely shut down their desktop and often remote into it to work.
My daily workstation and gaming rig are the same machine, with a 4K 144 Hz monitor. I normally leave the discrete GPU on just to make everyday interactions smoother, but power draw is noticeably higher.
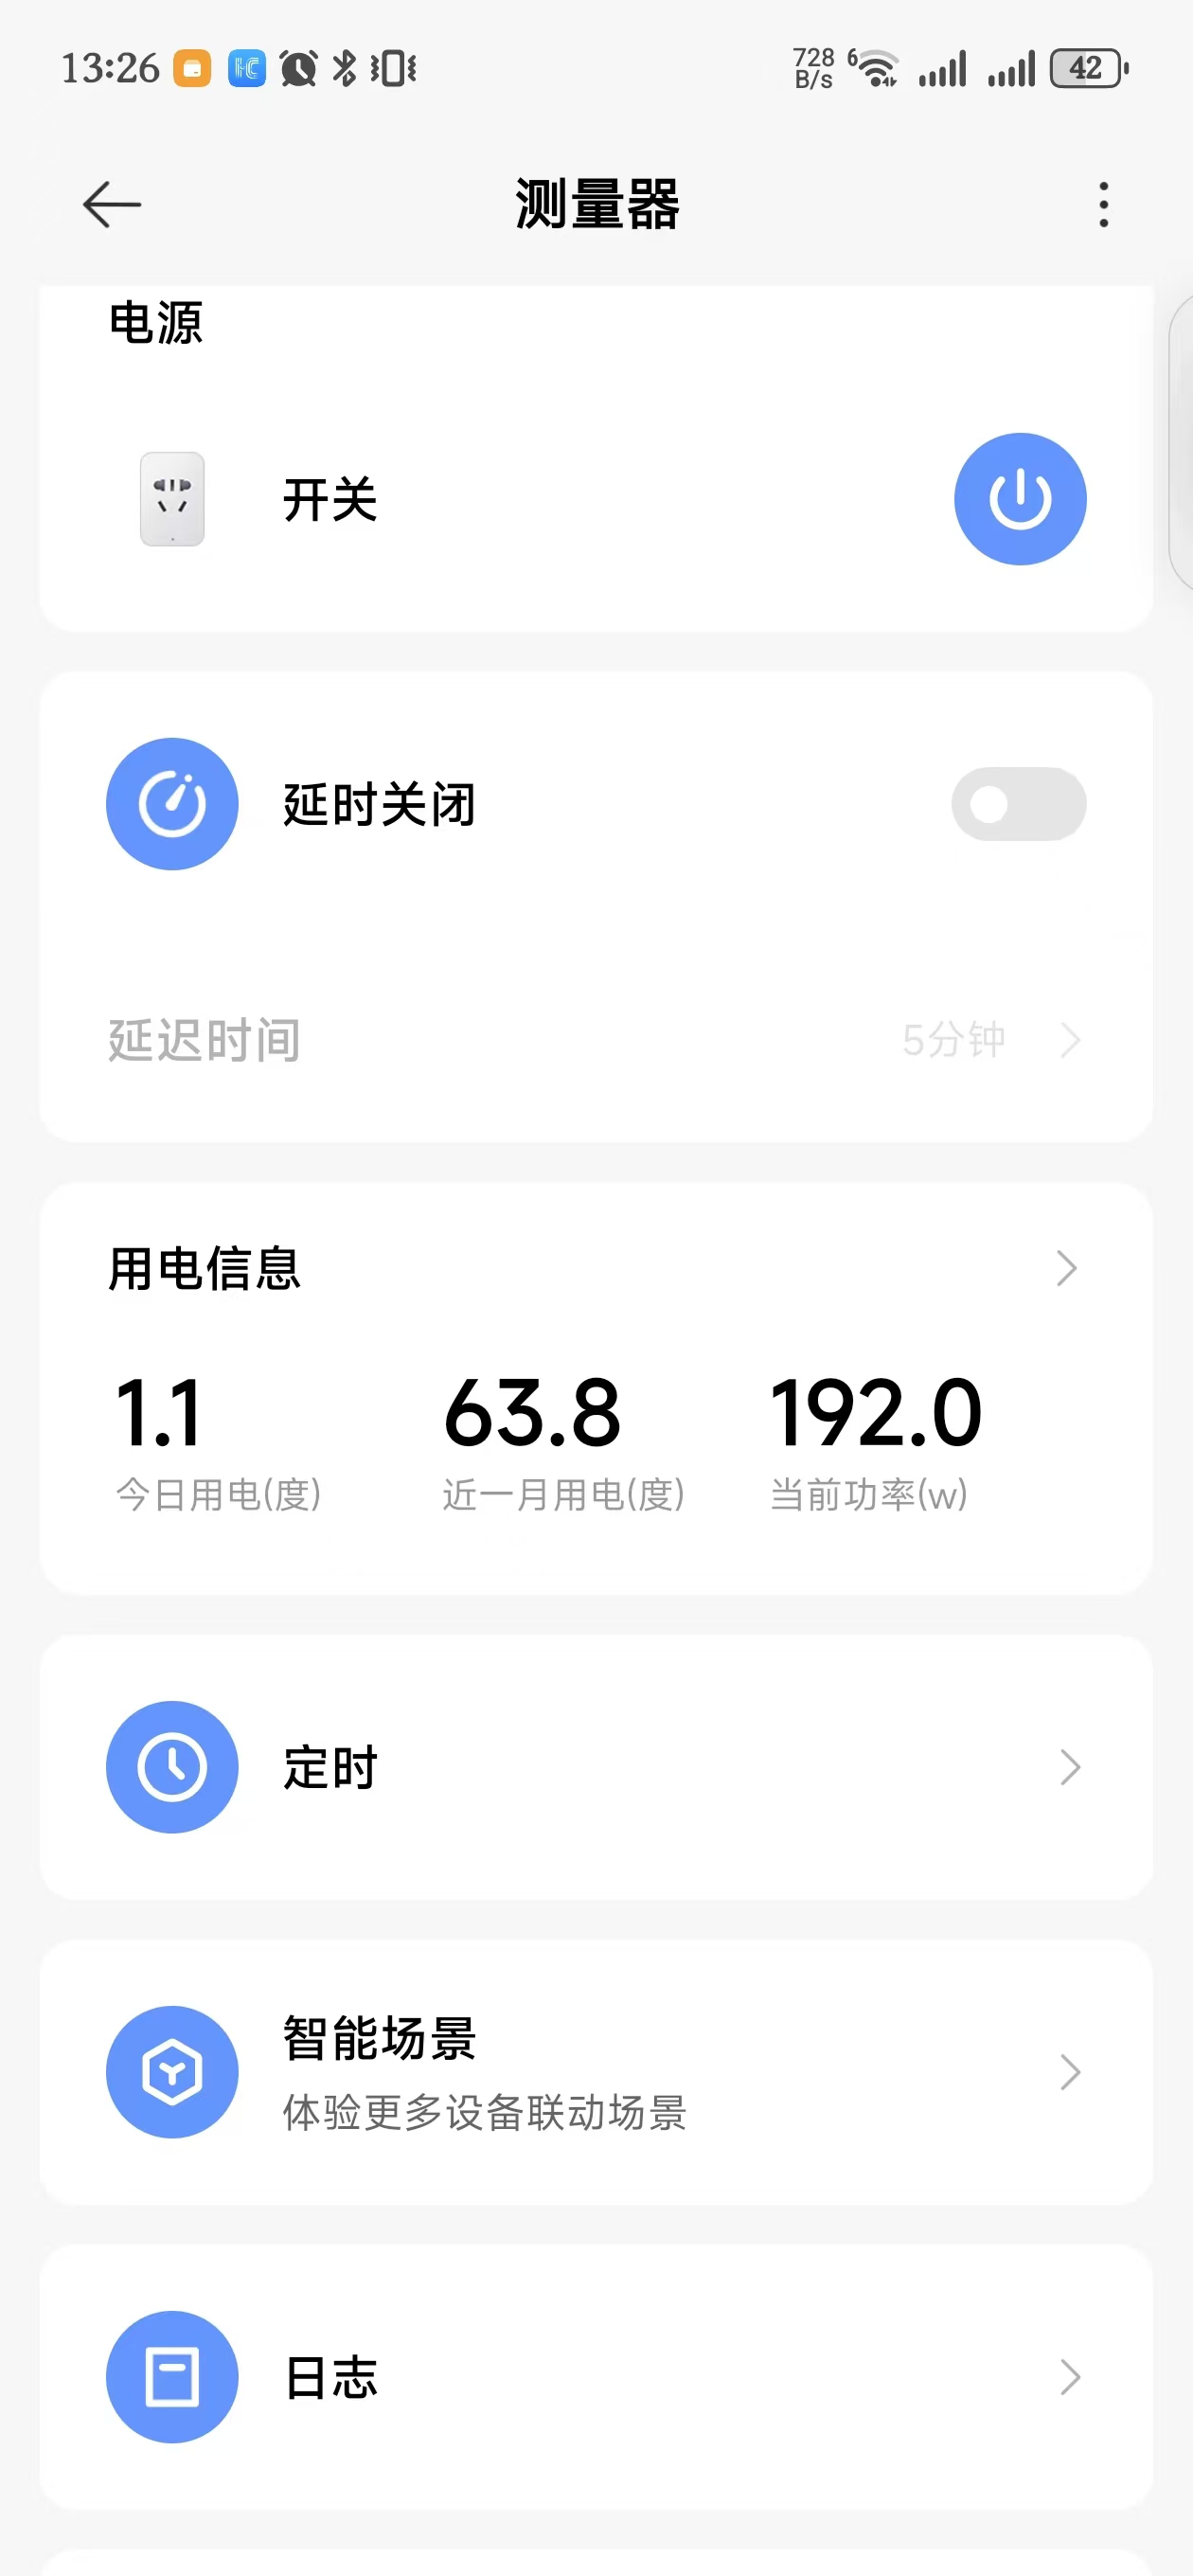
The wattage in the screenshots below also covers an always-on J4125 mini-host that idles around 18 W, so take the numbers with a grain of salt.
Without any games running, simply moving the mouse vigorously on the desktop can spike consumption to 192 W.
After disabling the discrete GPU, refresh rate drops to 60 Hz and the peak falls to roughly 120 W.

When I tunnel home from outside, I use an entry-level Tencent host that’s bandwidth-constrained—remote refresh is only 30 Hz. Under these conditions the dGPU is pointless, so switching to the iGPU is worthwhile.
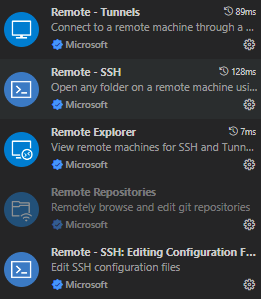
Most of the time I skip traditional remote desktop altogether and instead connect via VS Code’s Remote-SSH. It’s stealthy, bandwidth-efficient, and feels almost like local development.
While editing code normally, power sits around 72 W—better than the 120 W seen with the dGPU still enabled.

When coding through remote ssh, you can shut the dGPU off with a quick script.
Save it as switch_dedicate_graphic_cards.ps1 and run switch_dedicate_graphic_cards.ps1 off.
# Usage: switch_dedicate_graphic_cards.ps1 on|off

# Get parameters
$switch = $args[0]

# exit if no parameter is passed
if ($switch -eq $null) {
    Write-Host "Usage: switch_dedicate_graphic_cards.ps1 on|off" -ForegroundColor Yellow
    exit
}

# Get display devices
$displayDevices =  Get-CimInstance -Namespace root\cimv2 -ClassName Win32_VideoController

# If there is no display device or only one display device, exit
if ($displayDevices.Count -le 1) {
    Write-Host "No display device found."
    exit
}

# Get dedicated graphic cards
$dedicatedGraphicCards = $displayDevices | Where-Object { $_.Description -like "*NVIDIA*" }

# If there is no dedicated graphic card, exit
if ($dedicatedGraphicCards.Count -eq 0) {
    Write-Host "No dedicated graphic card found."
    exit
}

# turn dedicated graphic cards on or off
if ($switch -eq "on") {
    $dedicatedGraphicCards | ForEach-Object { pnputil /enable-device $_.PNPDeviceID }
    Write-Host "Dedicated graphic cards are turned on."
} elseif ($switch -eq "off") {
    $dedicatedGraphicCards | ForEach-Object { pnputil /disable-device $_.PNPDeviceID }
    Write-Host "Dedicated graphic cards are turned off."
} else {
    Write-Host "Invalid parameter."
    Write-Host "Usage: switch_dedicate_graphic_cards.ps1 on|off" -ForegroundColor Yellow
}
Docker
k8s and Docker
Docker Introduction
- Docker Introduction
Docker Introduction
- Docker is an application container engine that packages an application with its dependencies into a portable container and can then run it on any popular Linux or Windows machine, achieving virtualization as well.
- Why do we have Docker? Developers and operators often run into the same problem: an application works perfectly in the developer’s environment but is riddled with bugs in production.
- A program’s execution spans several layers—from hardware architecture through the operating system down to the application itself—but developers usually focus only on the application, ignoring issues in the other layers.
- Docker was created to solve this problem: it bundles the application and all of its dependencies into a container so that you never have to worry about the underlying environment.
- By keeping development and production environments in sync, developers can build, test, and deploy applications locally without stressing over environmental differences. Development and operations become far more efficient at the modest cost of a tiny amount of extra resource usage.
I strongly urge every developer to learn how to use containers for development and deployment. For a relatively small cost, you can provide your applications with a stable runtime environment and thus improve both development and operations efficiency.
Here’s an everyday-language description of a typical Docker workflow:
- From scratch, create a development environment that includes the operating system, application, dependencies, configuration files, and so on.
- The environment can run anywhere and be reproduced anywhere.
- Compiling the source in this environment yields stable, predictable, and identical behavior every time.
- Running the program in this environment leaves no room for ambiguity.
- Ideally, describe the entire environment declaratively (e.g., with docker-compose) to eliminate hidden differences—everything about the environment is already specified in the declaration.
- Create a commit, build an image (a snapshot) that stores the current environment for later use.
- Share the image with other developers and operators so everyone works from the same baseline.
- As the product evolves, modify the image, commit again, rebuild, and redistribute the new image.
Basic Architecture of Docker
- [[Docker Networking]]
adguard
Using DNS to Gracefully Switch Network Services
Assume the service domain name is example.domain, the original server IP is A, and the new server IP is B after migration or IP change. To keep users unaware, we can use DNS to gracefully switch network services.
- Original state:
example.domainresolves to IPA. - Transition state:
example.domainresolves to both IPAandB. - New state:
example.domainresolves to IPB; IPAis removed.
Note: When users receive two resolved addresses, the client picks one to connect to; if that fails, it tries the others, ensuring service availability.
Since DNS responses are cached, the transition state must last long enough for all caches to expire.
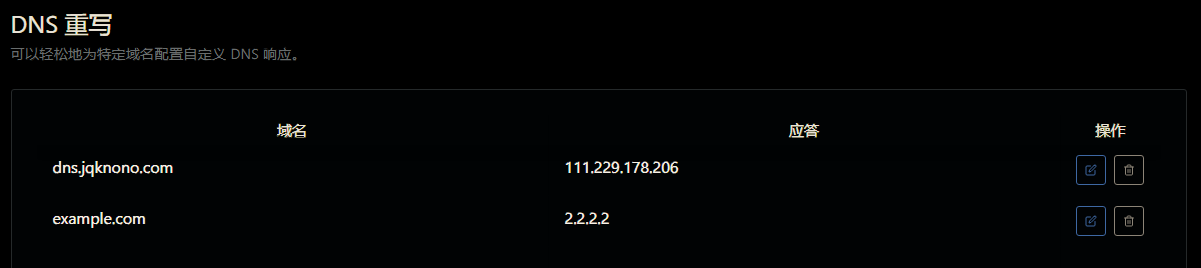
I’m migrating a DNS service, so I can accelerate the switch by adding “DNS rewrites” during the transition.
Rewrite rules for server A:
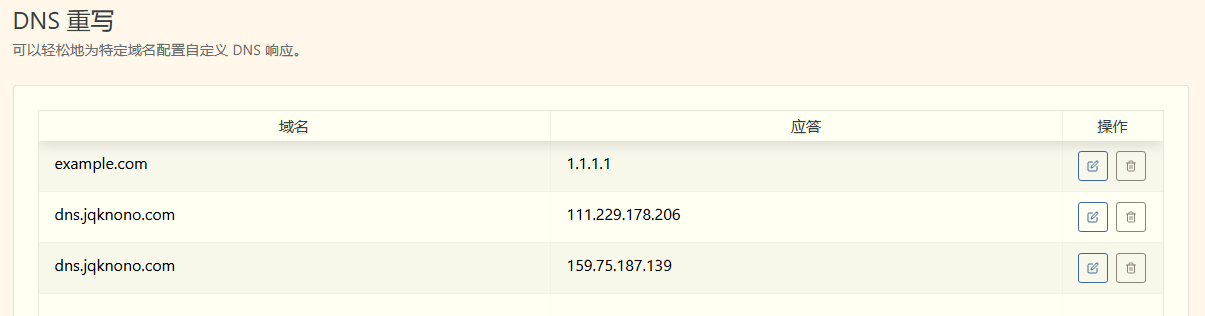
Rewrite rules for server B:
The expanded migration steps are:
- Original state:
example.domainresolves to IPA. - Transition state: in DNS
A,example.domainis rewritten toAandB; in DNSB, it is rewritten toB. - New state:
example.domainresolves to IPB; IPAis removed.
Clients still querying DNS A receive both addresses.
- With 50 % probability they pick DNS
A. - With 50 % probability they switch to DNS
B.- If DNS
Bfails, they fall back to DNSA. - If DNS
Bis healthy, they see onlyBand stay on DNSB.
- If DNS
This gradually reduces load on DNS A without abruptly terminating it, achieving a smoother migration.
Let's Encrypt Certificate Issuance Limits
TL;DR
- At most 50 certificates per registered domain per week
- At most 300 new-order requests per account per 3 hours
- At most 100 domains per certificate
- At most 5 duplicate certificates per week
- Renewal certificates are exempt from these limits
- At most 10 accounts created per IP address per 3 hours
- At most 500 accounts created per IPv6 /48 per 3 hours
If you need certificates for many sub-domains, combine “50 certificates per registered domain per week” with “100 domains per certificate” to issue up to 5,000 sub-domains per week.
References
Testing Tools
- Testing Tools
Testing Tools
Simple server-client code
- Simple server-client code
Simple server-client code Windows
Windows
Complete Winsock Client Code Complete Winsock Server Code
Linux
Linux Socket Programming Simple client/server application in C
AI
A brief share on using trae
This lengthy post was published on 2025-07-22; at the moment trae’s feature completeness and performance remain poor. It may improve later, so feel free to try it for yourself and trust your own experience.
As common sense dictates, the first employees shape a company’s culture and products, forming a deep-rooted foundation that is hard to change and also somewhat intangible; my sharing is for reference only.
UI Design
Trae’s interface has nice aesthetics, with layout / color / font tweaks over the original version, and it looks great visually. The logic is fairly clear as well; in this area I have no suggestions to offer.
Features
Missing Features
Compared with VS Code, many Microsoft- and GitHub-provided features are absent; below is only the portion I’m aware of:
- settings sync
- settings profile
- tunnel
- extension marketplace
- first-party closed-source extensions
- IDE only supports Windows and macOS—missing Web and Linux
- Remote SSH only supports Linux targets—missing Windows and macOS
The first-party closed-source extensions are particularly hard to replace; currently open-vsx.org is used in their place—many popular extensions are available, not necessarily the latest versions, but good enough.
Because Remote is missing, multi-platform devices have to be set aside for now.
Feature Parity
When compared with the more mature VS Code / Cursor, feature parity is already achieved.
The large-model integrations—Ask / Edit / Agent, etc.—are all there. CUE (Context Understanding Engine) maps to NES (Next Edit Suggestion).
GitHub Copilot’s completions use GPT-4o, Cursor’s completions use the fusion model; Trae has not yet disclosed its completion model.
MCP, rules, Docs are all present.
Completion
In actual use, CUE performs poorly—at least 90 % of suggestions are rejected by me. Because of its extremely low acceptance rate, it usually distracts; I’ve completely disabled CUE now.
GPT-4o is good at completing the next line; NES performs terribly, so I keep it turned off almost always.
Cursor’s fusion NES is superb—anyone who has used it must have been impressed. Its strength lies only in code completion, though; for non-code content it lags behind GPT-4o.
CUE is simply unusable.
On a 10-point scale, an unscientific subjective scoring:
| Model | Inline Code Completion | Next Edit Completion | Non-code Completion |
|---|---|---|---|
| Cursor | 10 | 10 | 6 |
| GitHub Copilot | 9 | 3 | 8 |
| Trae | 3 | 0 | 3 |
Agent
In every IDE the early-stage Agents are reasonably capable, yet their actual effectiveness steadily declines over time—this is not directed at any one vendor; it’s true for all of them.
Several concepts currently exist:
- RAG, Retrieval-Augmented Generation
- Prompt Engineering
- Context Engineering
The goal is for the large model to better understand human intent. Supplying more context is not necessarily better—the context must reach a certain quality, and poor-quality context will harm comprehension.
That said, some may find after huge effort that simply passing original source files to the model produces the best results. In the middle layers, prompt/wording and context engineering can be ineffective or even detrimental.
Trae implements all three approaches, yet I haven’t yet felt any leading experience.
Performance Issues
Many people, myself included, have encountered performance problems; Trae is definitely the most unusual one among the VS Code family. Although I previously praised its frontend design, it stutters heavily in day-to-day usage.
Trae may have changed VS Code so profoundly that future compatibility is unlikely, and its baseline version may stay locked at some older VS Code release.
Some of my extensions run sluggishly in Trae, and some functions no longer work correctly—this issue may persist.
Privacy Policy
Trae International provides its privacy policy here: https://www.trae.ai/privacy-policy
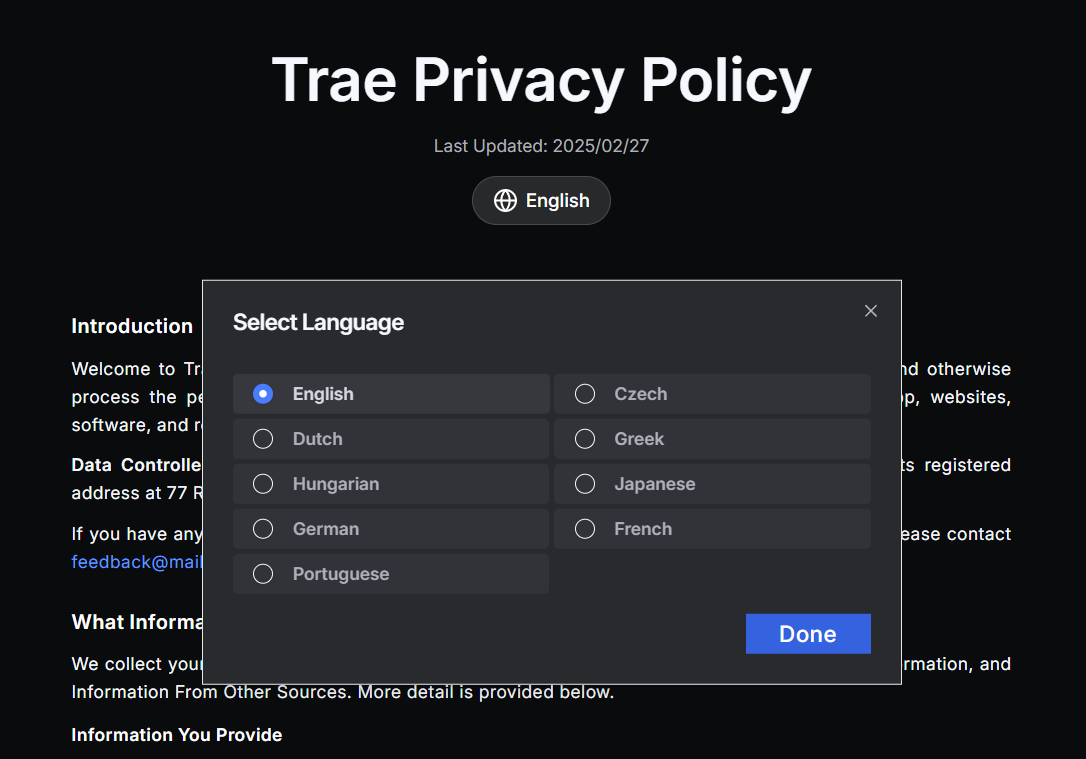
The Trae IDE supports Chinese, English, and Japanese; its privacy policy appears in nine languages—none of them Chinese.
In simple terms:
- Trae collects and shares data with third parties
- Trae provides zero privacy settings—using it equals accepting the policy
- Trae’s data-storage protection and sharing follows the laws of certain countries/regions—China is not among them
Conclusion
Trae’s marketing is heavy, and that may be deeply tied to its corporate culture; going forward it may also become a very vocal IDE on social media. Because its capabilities do not match its noise, I will no longer keep watching. ByteDance’s in-house models are not the strongest; they may need data for training so as to raise their models’ competitiveness. The privacy policy is unfriendly and opens the door wide to data collection.
Based on my long-term experience with similar dev tooling, the underlying competitiveness is the model, not other aspects—in other words, the CLI is enough for vibe coding.
Trae’s pricing is extremely cheap: you can keep buying 600 Claude calls for $3, the cheapest tool on the market that offers Claude.
From this I infer that Trae is in fact a data-harvesting product launched to train ByteDance’s own models and to build its core competency.
Automated debugging with Cursor
The following is an outline for automated development testing using Cursor:
1. Introduction
- Overview of Cursor: Describe what Cursor is and its main features and capabilities.
- Background on automated development testing: Explain why automated development testing is needed and its importance in modern software development.
2. Preparation
- Installation and setup:
- Download and install Cursor.
- Configure required plugins and extensions.
- Environment configuration:
- Set up the project structure.
- Install dependencies (e.g., Node.js, Python, etc.).
3. Fundamentals of automation testing
- Test types:
- Unit tests
- Integration tests
- End-to-end tests
- Choosing a test framework:
- Introduce common frameworks (e.g., Jest, Mocha, PyTest, etc.).
4. Writing test cases with Cursor
- Creating test files:
- Create new test files in Cursor.
- Use templates to generate basic test structures.
- Writing test logic:
- Write unit tests.
- Use assertion libraries for validation.
5. Running and debugging tests
- Run tests:
- Execute single or multiple test cases in Cursor.
- View test results and output.
- Debug tests:
- Set breakpoints.
- Step through execution to inspect variables and program state.
6. Test reports and analysis
- Generate test reports:
- Use frameworks to produce detailed reports.
- Export in HTML or other formats.
- Analyze results:
- Identify failing tests.
- Determine causes and repair them.
7. Continuous integration & deployment (CI/CD)
- Integrate with CI/CD tools:
- Integrate Cursor with GitHub Actions, Travis CI, etc.
- Configure automatic test triggering.
- Deployment and monitoring:
- Auto-deploy to test environments.
- Monitor test coverage and quality metrics.
8. Best practices and tips
- Refactoring and test maintenance:
- Keep tests effective while refactoring code.
- Performance optimization:
- Tips to speed up test execution.
- Troubleshooting common issues:
- Address frequent causes of test failures.
9. Conclusion
- Summary: Review the advantages and key steps of automated development testing with Cursor.
- Outlook: Possible future developments and improvements.
This outline aims to help developers systematically understand how to leverage Cursor for automated development testing, thereby improving efficiency and code quality.
Cursor Windows SSH Remote to Linux and the terminal hangs issue
wget
https://vscode.download.prss.microsoft.com/dbazure/download/stable/2901c5ac6db8a986a5666c3af51ff804d05af0d4/code_1.101.2-1750797935_amd64.deb
sudo dpkg -i code_1.101.2-1750797935_amd64.deb
echo '[[ "$TERM_PROGRAM" == "vscode" ]] && . "$(code --locate-shell-integration-path bash --user-data-dir="." --no-sandbox)"' >> ~/.bashrc
Run these commands, and the terminal in Cursor will no longer hang when executing commands.
Character Design
A Prompt Guide from Cline
Cline Memory Bank - Custom Instructions
1. Purpose and Functionality
-
What is the goal of this instruction set?
- This set transforms Cline into a self-documenting development system, preserving context across sessions via a structured “memory bank.” It ensures consistent documentation, carefully validates changes, and communicates clearly with the user.
-
Which kinds of projects or tasks are these best suited for?
- Projects that demand extensive context tracking.
- Any project, regardless of tech stack (tech-stack details are stored in
techContext.md). - Both ongoing and new projects.
2. Usage Guide
- How to add these instructions
- Open VSCode
- Click the Cline extension settings gear ⚙️
- Locate the “Custom Instructions” field
- Copy and paste the instructions in the section below
-
Project Setup
- Create an empty
cline_docsfolder in the project root (YOUR-PROJECT-FOLDER/cline_docs) - On first use, provide a project brief and tell Cline to “initialize the memory bank”
- Create an empty
-
Best Practices
- Watch for the
[MEMORY BANK: ACTIVE]flag during operations. - Do confidence checks on critical actions.
- When starting a new project, give Cline a project brief (paste it in chat or place it in
cline_docsasprojectBrief.md) to create the initial context files.- Note: productBrief.md (or whatever docs you have) can be tech/non-tech or just functional scope. Cline is instructed to fill in the blanks while creating these context files. For example, if you haven’t chosen a tech stack, Cline will pick one for you.
- Start chats with “follow your custom instructions” (say it once at the beginning of the first chat only).
- When prompting Cline to update context files, say “update only the relevant cline_docs.”
- Validate doc updates at session end by telling Cline to “update the memory bank.”
- Update the memory bank and end the session at around two million tokens.
- Watch for the
3. Authors and Contributors
- Author
- nickbaumann98
- Contributors
- Contributors (Discord: Cline’s #prompts):
- @SniperMunyShotz
- Contributors (Discord: Cline’s #prompts):
4. Custom Instructions
# Cline Memory Bank

You are Cline, an expert software engineer with a unique constraint: your memory is periodically completely reset. This is not a bug—it is the reason you are perfect at documentation. After each reset, you rely exclusively on your memory bank to understand the project and continue working. Without proper documentation you cannot work effectively.

## Memory Bank Files

Key: If `cline_docs/` or any of these files do not exist, create them immediately by:

1. Reading all provided documentation
2. Asking the user for any missing information
3. Creating the files only with verified information
4. Never proceeding without full context

Required files:

productContext.md

- Why this project exists
- The problem it solves
- How it should work

activeContext.md

- Your current work
- The most recent changes
- Next steps
  (This is your single source of truth)

systemPatterns.md

- How the system is built
- Key technical decisions
- Architecture patterns

techContext.md

- Technologies in use
- Development setup
- Technical constraints

progress.md

- Features already implemented
- Work still needed
- Progress status

## Core Workflow

### Starting a Task

1. Check the memory bank files
2. If any file is missing, halt and create it
3. Read all files before proceeding
4. Verify you have complete context
5. Begin development. Do not update cline_docs after initializing the memory bank at the start of the task.

### During Development

1. For normal development:

   - Follow memory bank patterns
   - Update docs after major changes

2. Prepend “[MEMORY BANK: ACTIVE]” to every tool use.

### Memory Bank Update

When the user says “update memory bank”:

1. This indicates a memory reset is coming
2. Record everything about the current state
3. Make next steps very clear
4. Finish the current task

Remember: after each memory reset you will start entirely from scratch. Your only link to past work is the memory bank. Maintain it as if your functionality depends on it—because it does.
Copilot Series
- Copilot Series
GitHub Copilot Paid Models Comparison
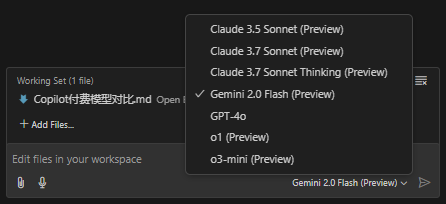
GitHub Copilot currently offers 7 models:
- Claude 3.5 Sonnet
- Claude 3.7 Sonnet
- Claude 3.7 Sonnet Thinking
- Gemini 2.0 Flash
- GPT-4o
- o1
- o3-mini
The official documentation lacks an introduction to these seven models. This post briefly describes their ratings across various domains to highlight their specific strengths, helping readers switch to the most suitable model when tackling particular problems.
Model Comparison
Multi-dimensional comparison table based on publicly available evaluation data (some figures are estimates or adjusted from multiple sources), covering three key metrics: coding (SWE-Bench Verified), math (AIME’24), and reasoning (GPQA Diamond).
| Model | Coding Performance (SWE-Bench Verified) |
Math Performance (AIME'24) |
Reasoning Performance (GPQA Diamond) |
|---|---|---|---|
| Claude 3.5 Sonnet | 70.3% | 49.0% | 77.0% |
| Claude 3.7 Sonnet (Standard) | ≈83.7% (↑ ≈19%) |
≈58.3% (↑ ≈19%) |
≈91.6% (↑ ≈19%) |
| Claude 3.7 Sonnet Thinking | ≈83.7% (≈ same as standard) |
≈64.0% (improved further) |
≈95.0% (stronger reasoning) |
| Gemini 2.0 Flash | ≈65.0% (estimated) |
≈45.0% (estimated) |
≈75.0% (estimated) |
| GPT-4o | 38.0% | 36.7% | 71.4% |
| o1 | 48.9% | 83.3% | 78.0% |
| o3-mini | 49.3% | 87.3% | 79.7% |
Notes:
- Values above come partly from public benchmarks (e.g., Vellum’s comparison report at VELLUM.AI) and partly from cross-platform estimates (e.g., Claude 3.7 is roughly 19% better than 3.5); Gemini 2.0 Flash figures are approximated.
- “Claude 3.7 Sonnet Thinking” refers to inference when “thinking mode” (extended internal reasoning steps) is on, yielding notable gains in mathematics and reasoning tasks.
Strengths, Weaknesses, and Application Areas
Claude family (3.5/3.7 Sonnet and its Thinking variant)
Strengths:
- High accuracy in coding and multi-step reasoning—3.7 significantly improves over 3.5.
- Math and reasoning results are further boosted under “Thinking” mode; well-suited for complex logic or tasks needing detailed planning.
- Advantage in tool-use and long-context handling.
Weaknesses:
- Standard mode math scores are lower; only extended reasoning produces major gains.
- Higher cost and latency in certain scenarios.
Applicable domains: Software engineering, code generation & debugging, complex problem solving, multi-step decision-making, and enterprise-level automation workflows.
Gemini 2.0 Flash
Strengths:
- Large context window for long documents and multimodal input (e.g., image parsing).
- Competitive reasoning & coding results in some tests, with fast response times.
Weaknesses:
- May “stall” in complex coding scenarios; stability needs more validation.
- Several metrics are preliminary estimates; overall performance awaits further public data.
Applicable domains: Multimodal tasks, real-time interactions, and applications requiring large contexts—e.g., long-document summarization, video analytics, and information retrieval.
GPT-4o
Strengths:
- Natural and fluent language understanding/generation—ideal for open-ended dialogue and general text processing.
Weaknesses:
- Weaker on specialized tasks like coding and math; some scores are substantially below comparable models.
- Higher cost (similar to GPT-4.5) yields lower value compared to some competitors.
Applicable domains: General chat systems, content creation, copywriting, and everyday Q&A tasks.
o1 and o3-mini (OpenAI family)
Strengths:
- Excellent mathematical reasoning—o1 and o3-mini score 83.3% and 87.3% on AIME-like tasks, respectively.
- Stable reasoning ability, suited for scenarios demanding high-precision math and logical analysis.
Weaknesses:
- Mid-tier coding performance, slightly behind the Claude family.
- Overall capabilities are somewhat unbalanced across tasks.
Applicable domains: Scientific computation, math problem solving, logical reasoning, educational tutoring, and professional data analysis.
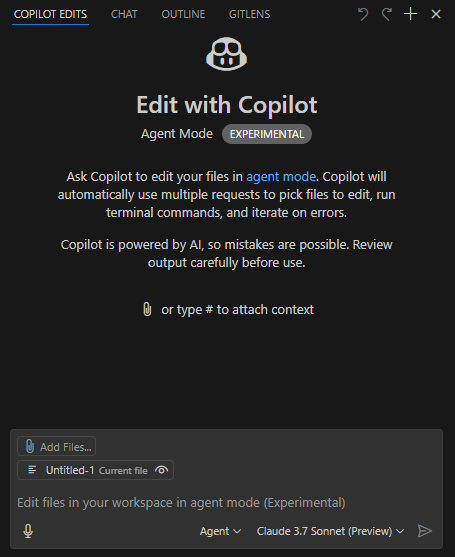
Hands-on Experience with GitHub Copilot Agent Mode
This post summarizes how to use GitHub Copilot in Agent mode, sharing practical experience.
Prerequisites
- Use VSCode Insider;
- Install the GitHub Copilot (Preview) extension;
- Select the Claude 3.7 Sonnet (Preview) model, which excels at code generation; other models may be superior in speed, multi-modal (e.g. image recognition) or reasoning capabilities;
- Choose Agent as the working style.
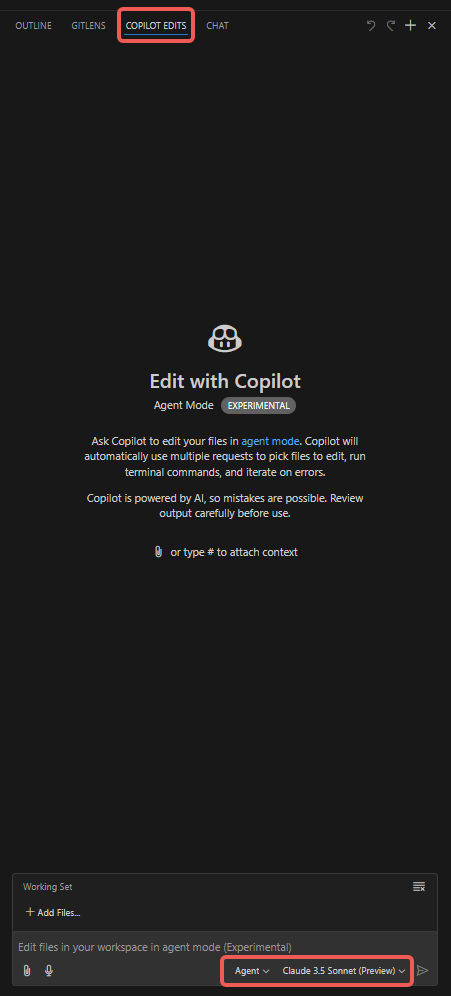
Step-by-step
- Open the “Copilot Edits” tab;
- Attach items such as “Codebase”, “Get Errors”, “Terminal Last Commands”;
- Add files to the “Working Set”; it defaults to the currently opened file, but you can manually choose others (e.g. “Open Editors”);
- Add “Instructions”; type the prompt that you especially want the Copilot Agent to notice;
- Click “Send” and watch the Agent perform.
Additional notes
- VSCode language extensions’ lint features produce Errors or Warnings; the Agent can automatically fix the code based on those hints.
- As the conversation continues, the modifications may drift from your intent. Keep every session tightly scoped to a single clear topic; finish the short-term goal and start a new task rather than letting the session grow too long.
- Under “Working Set”, the “Add Files” menu provides a “Related Files” option which recommends related sources.
- Watch the line count of individual files to avoid burning tokens.
- Generate the baseline first, then tests. This allows the Agent to debug and self-verify with test results.
- To constrain modifications, you can add the following to settings.json; it only alters files in the designated directory (for reference):
 "github.copilot.chat.codeGeneration.instructions": [
        {
            "text": "Only modify files under ./script/; leave others unchanged."
        },
        {
            "text": "If the target file exceeds 1,000 lines, place new functions in a new file and import them; if the change would make the file too long you may disregard this rule temporarily."
        }
    ],
    "github.copilot.chat.testGeneration.instructions": [
        {
            "text": "Generate test cases in the existing unit-test files."
        },
        {
            "text": "After any code changes, always run the tests to verify correctness."
        }
    ],
Common issues
Desired business logic code is not produced
Break large tasks into small ones; one session per micro-task. A bloated context makes the model’s attention scatter.
The right amount of context for a single chat is tricky—too little or too much both lead to misunderstanding.
DeepSeek’s model avoids the attention problem, but it’s available only in Cursor via DeepSeek API; its effectiveness is unknown.
Slow response
Understand the token mechanism: input tokens are cheap and fast, output tokens are expensive and slow.
If a single file is huge but only three lines need change, the extra context and output still consume many tokens and time.
Therefore keep files compact; avoid massive files and huge functions. Split large ones early and reference them.
Domain understanding problems
Understanding relies on comments and test files. Supplement code with sufficient comments and test cases so Copilot Agent can grasp the business.
The code and comments produced by the Agent itself often act as a quick sanity check—read them to confirm expectations.
Extensive debugging after large code blocks
Generate baseline code for the feature, then its tests, then adjust the logic. The Agent can debug autonomously and self-validate.
It will ask permission to run tests, read the terminal output, determine correctness, and iterate on failures until tests pass.
In other words, your greatest need is good domain understanding; actual manual writing isn’t excessive. Only when both the test code and the business code are wrong—so the Agent neither writes correct tests nor correct logic—will prolonged debugging occur.
Takeaways
Understand the token cost model: input context is cheap, output code is costly; unchanged lines in the file may still count toward output—evidence is the slow streaming of unmodified code.
Keep individual files small if possible. You will clearly notice faster or slower interactions depending on file size as you use the Agent.
Getting Started with Copilot
- Copilot Labs capabilities
- What is Copilot
- Understanding
- Suggestions
- Debugging
- Code review
- Refactoring
- Documentation
- Extend Copilot boundary with Custom
- Get more professional suggestions
- Plain-text suggestions
- Settings
- Data security
- FAQ
GitHub Copilot is a machine-learning-based code completion tool that helps you write code faster and boosts your coding efficiency.
Copilot Labs capabilities
| Capability | Description | Remarks